CIPA Litigation Prevention Guide
Understand why CIPA lawsuits are rising and how to minimize privacy risk on your website.
Thank you!
Please check your email to view the guide.
Steps to Implement Privado Cookie Consent in your Website
December 4, 2020
5
mins read


Privado's Cookie Consent solution
Cookie Consent is the process by which websites take user's consent to set cookies. It started with Europe's ePrivacy directive or the cookie law. With ePrivacy, it was mandatory for websites to take consent from users before storing or accessing cookies from user's devices.
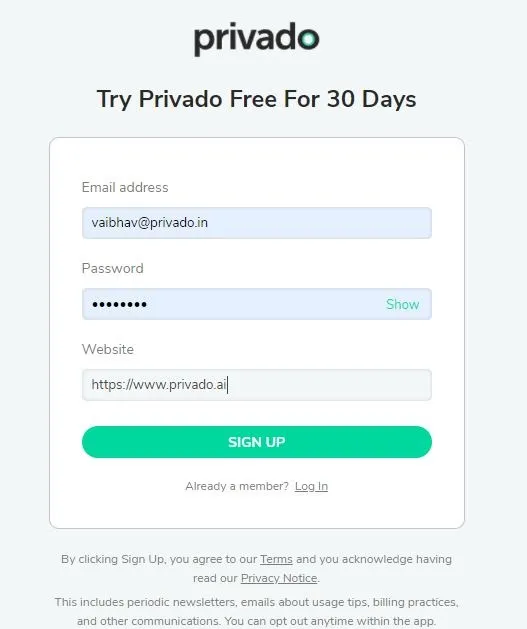
Getting Started with Privado
First, you will need to create an account on Privado's Cookie Consent solution. For details on how our cookie consent tool works, please check our knowledge base.
Categorizing Cookies:
We conduct a deep scan of your website and generate a list of cookies that you are using. We auto-categorize them into different categories, some of the lesser known cookies are not categorized and you should do so. More details on categorizing cookies are here.

Designing Cookie Consent Banner:
You can customize the cookie consent banner based on your website styling including text color, button color, background color and the text which has to be displayed. Refer to our article for more details on styling of the cookie consent banner.
Styling Cookie Consent Banner
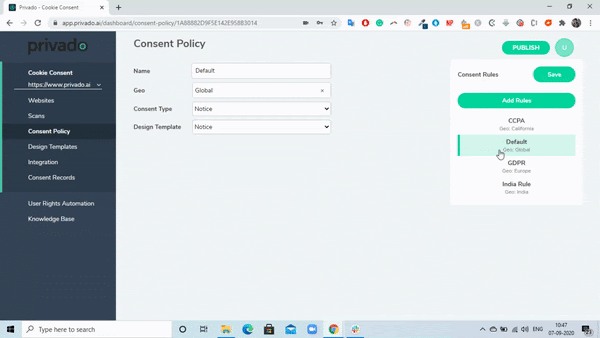
Geo-Targetting Users:
Each country has their own requirements on the use of cookies. Europe has a strict Opt-In requirement, whereas California with CCPA has a Opt-Out requirement. You can geo-target users and display the right cookie consent banner with Opt-In/Opt-Out flow using our product. Here is a detailed article on how to set geo-targetting with Privado.
Publishing Javascript
Once you have made all the changes, hit the Publish button at the top to make these changes live. Go to the Integrations tab and copy the Javascript code. This single line of code will be used to integrate the cookie consent banner in Webflow.

Adding Cookie Consent Javascript to your Website
Copy the cookie consent javascript from the Integrations page and then put that as the first script in the header of your website. Here is a list of tutorials on how to add the script for website builders:
Industry insights you won’t delete. Delivered to your inbox.
Get regular updates from Privado AI
Request free website audit
Request Privado AI demo
Share